Skiaform / Guides
Landscape architecture portfolio: a practical guide
Build a landscape architecture portfolio with selected projects, readable site plans, clear page sequences and an application PDF under 10 MB.
Your landscape architecture portfolio should let someone follow a proposal from the site to the spaces you designed. For an internship or first job, studio work can carry that explanation through plans, sections and technical drawings. Start with your best projects, then give each page a clear job. The figures here are fictional architecture samples showing page structure; replace their content with your own landscape projects.
What a landscape architecture portfolio needs to show
Give your reader enough context to understand the ground you worked with. A site analysis can locate surrounding streets, existing vegetation and water movement. Show the ecological conditions you studied and connect them to a decision visible in the proposal. Keep existing conditions distinct from proposed changes.
At site scale, your plan should explain the organizing idea. You might trace a route through a campus, connect a park to adjacent streets, or arrange outdoor rooms around a residence. Choose the drawing that makes that relationship easiest to follow.
Then bring the reader to human scale. Sections and perspectives can show how a path meets a planted edge, how a seat relates to shade, or how the ground changes beneath a route. Planting, grading and material details explain how you developed those spaces toward construction. Label the work's stage accurately so a studio detail reads as a proposal.
Choose projects that support a closer look
Choose 3 to 5 of your best projects. For your first landscape architect portfolio, a mix of scales gives you room to explain different decisions: a park or campus plan can sit alongside a streetscape or residential garden. Include each project because its drawings support a clear explanation.
If you have them, include technical drawings in at least one project. A planting plan, grading drawing or construction detail gives you something specific to discuss beyond the overall image. Select a readable portion and keep enough context to locate it within the site.
Credit teammates beside the project facts and state your contribution. Identify shared work in captions where necessary. If your role was site analysis and planting design, say so; keep those credits consistent across the PDF and website.
Build a short sample and a core portfolio
Prepare a 3 to 5 page work sample and a 10 to 14 page core portfolio. Use the same page size, project facts and type styles in both. The short version condenses projects into single pages; the core gives their drawings more room.
For a five-page work sample, use:
- Cover with your name, contact details and a strong drawing or image.
- Project one on a single page.
- Project two on a single page.
- Project three on a single page.
- Contact page.
For a ten-page core, use:
- Cover.
- About and resume.
- Project one opener.
- Project one image body page.
- Project one drawings page.
- Project two opener.
- Project two body page.
- Project three opener.
- Project three body page.
- Contact.
Give the first project the extra drawings page because it can support a closer look. Extend toward fourteen pages only when another project needs that space. Keep the about statement within 35 to 50 words, beside compact education and experience entries, skills, and any awards.
Open with the site, then move closer
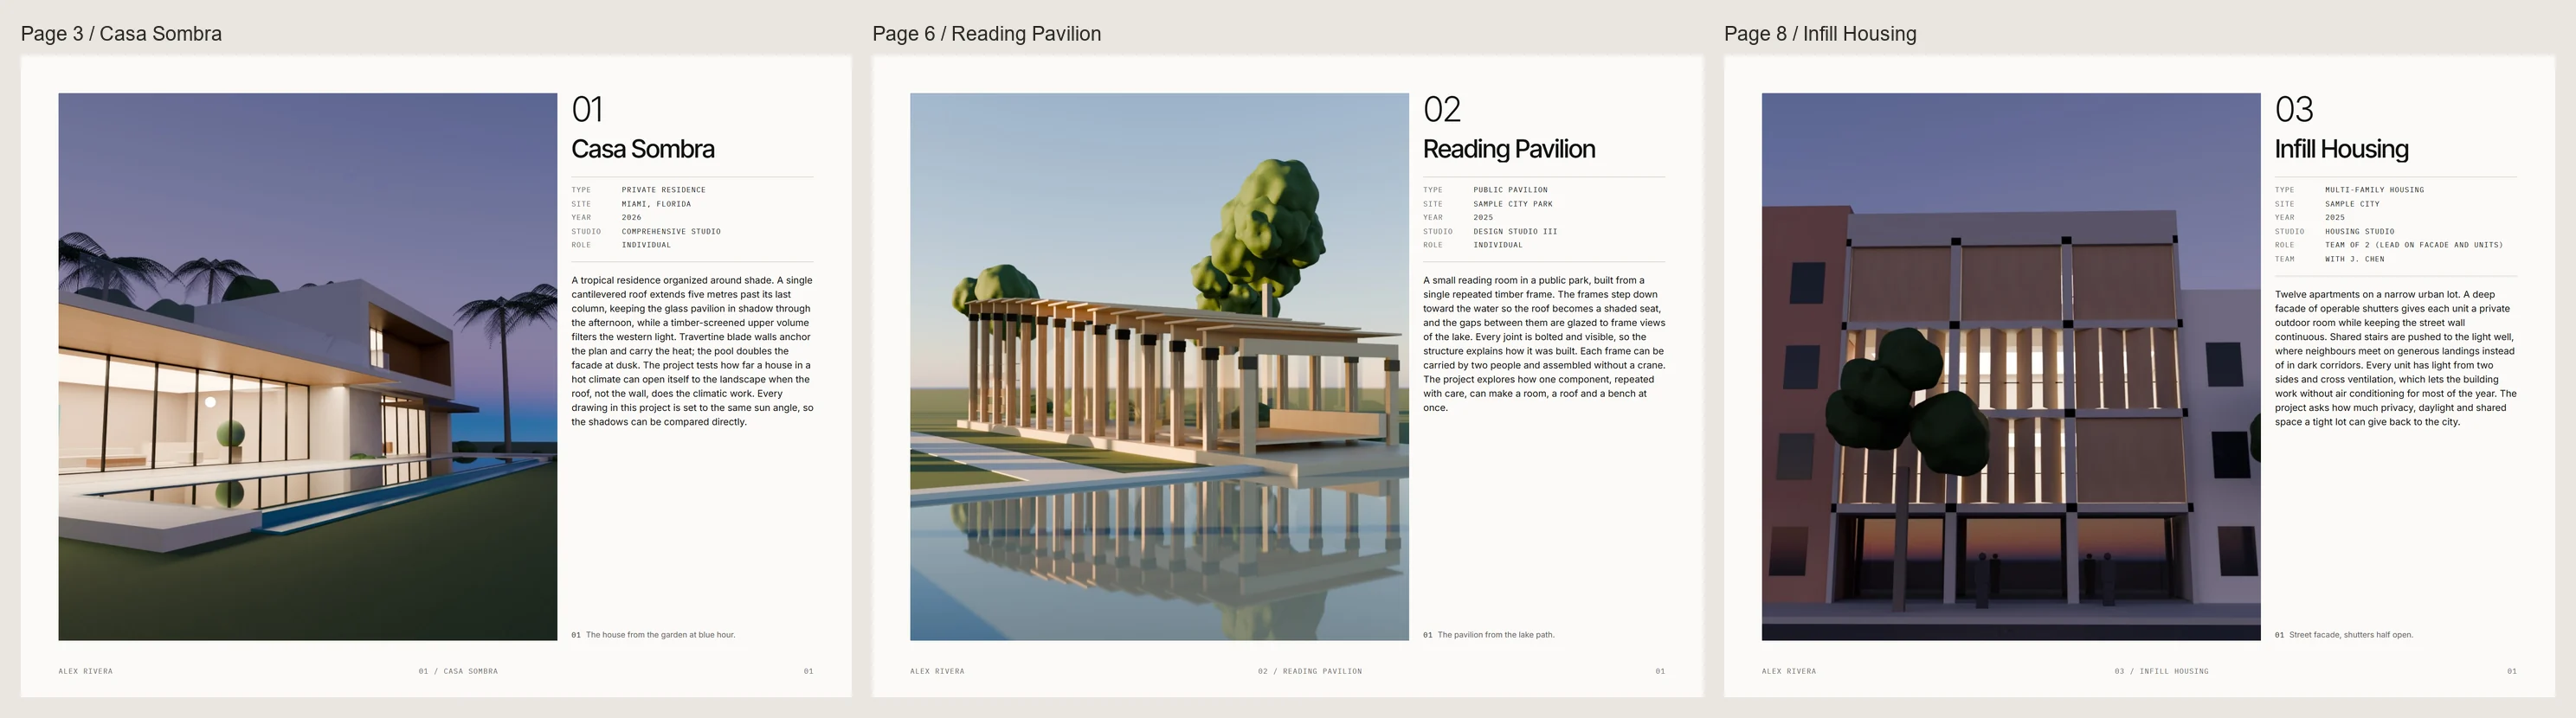
For a landscape project, a site plan or aerial diagram can lead the opener. Give it eight columns and reserve four for the title, facts and an 80 to 120 word description. Record type, site, year, studio, role and team in the same order each time.
Follow with sections, then perspectives and details that explain the spaces they cut through. An image body page can pair a large section with smaller views; keep the technical drawing page for planting, grading or construction work that needs more room. In the work sample, choose the clearest supporting drawing and shorten the description.
Make drawings readable at page size
Place site plans at a size where paths and planting areas remain legible. A large site may need an overall plan followed by an enlarged area. Locate that area on the overall plan so the reader can move between the two.
Put a graphic scale bar and north arrow inside every plan before exporting. State each drawing's scale in its caption and check the ratio against the final printed size after resizing. Keep the graphic bar with the drawing so it scales with the image on screen.
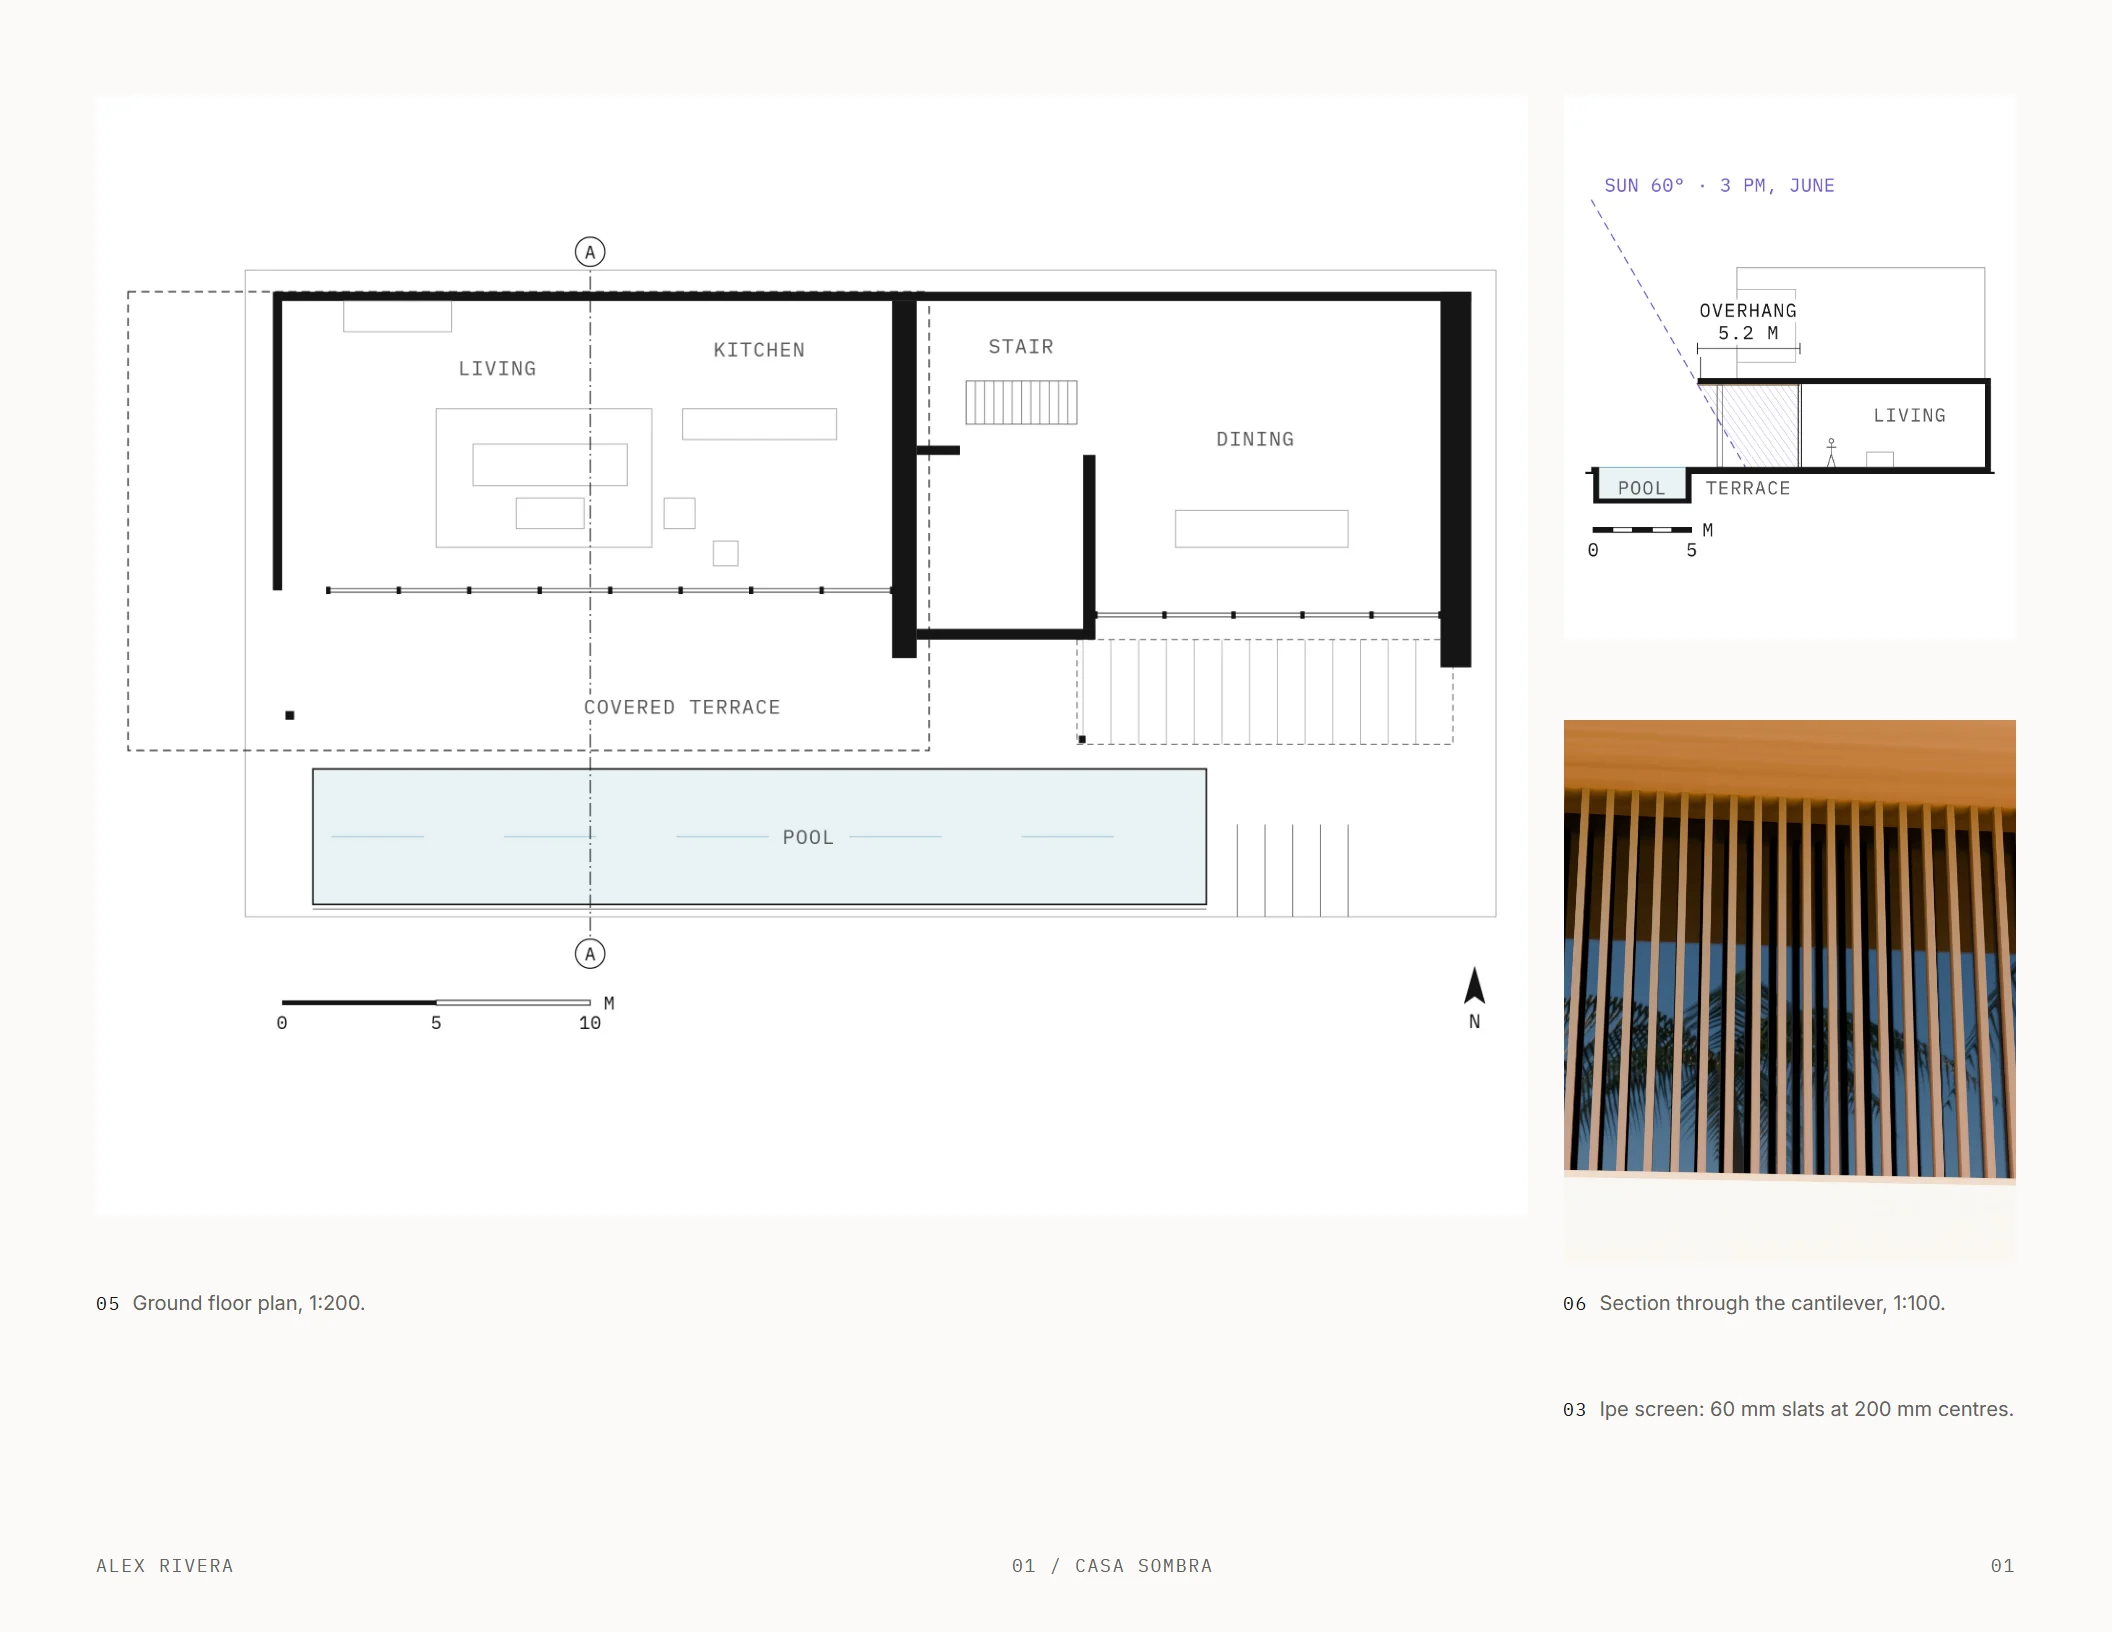
In sections, draw people and planting at true scale. Match tree sizes to the growth stage you are showing, and keep section cuts identifiable on the plan. Use consistent labels so a reader can connect a path or planted area across drawings.
Check plant labels and legends at final page size. The layout guide's drawing advice explains how to give a main drawing room before adding details. Use the examples' checks of at least 7 pt drawing text and 0.25 pt lines at placement, then inspect the exported PDF for disappearing marks.
Hand drawing and watercolour are useful when the scan preserves linework and tonal differences. Remove page shadows, straighten the sheet and check that pale washes survive the export. Give a sketch enough space to explain its subject.
Keep analysis diagrams few and clear
Choose analysis that connects to your design. A sun diagram can explain a shaded route; a water diagram can locate the flow you responded to. Circulation and habitat diagrams belong when they help you explain decisions shown on the plan.
Give each diagram one idea. Keep the base map, orientation and graphic language consistent so readers can compare them without learning a new legend each time. Separate existing conditions from your proposed response through labels and a repeatable graphic distinction.
When you study landscape architecture portfolio examples, follow the connection between analysis and proposal. Apply that check to your own pages: place a diagram near the drawing it informs, and remove analysis you never use in the explanation.
Render the design you drew
Keep paths, ground levels and planting locations consistent between your plans and renderings. Choose viewpoints that reveal a designed space, such as the connection between a seating edge and a route. Compare the final image against the drawings before placing it.
State the season and planting growth stage when they affect what the image shows. Use a caption such as "Planting at 5 years" only if that is what you modeled. Keep newly planted and established conditions clearly identified, and avoid using mature canopies to imply shade your chosen growth stage does not support.
If you use AI, check its output against your model and drawings. AI may draw, style and render geometry you modeled; it never adds to or changes your design. Keep your captions accurate about what you made and what the image represents.
Use one grid and a consistent type direction
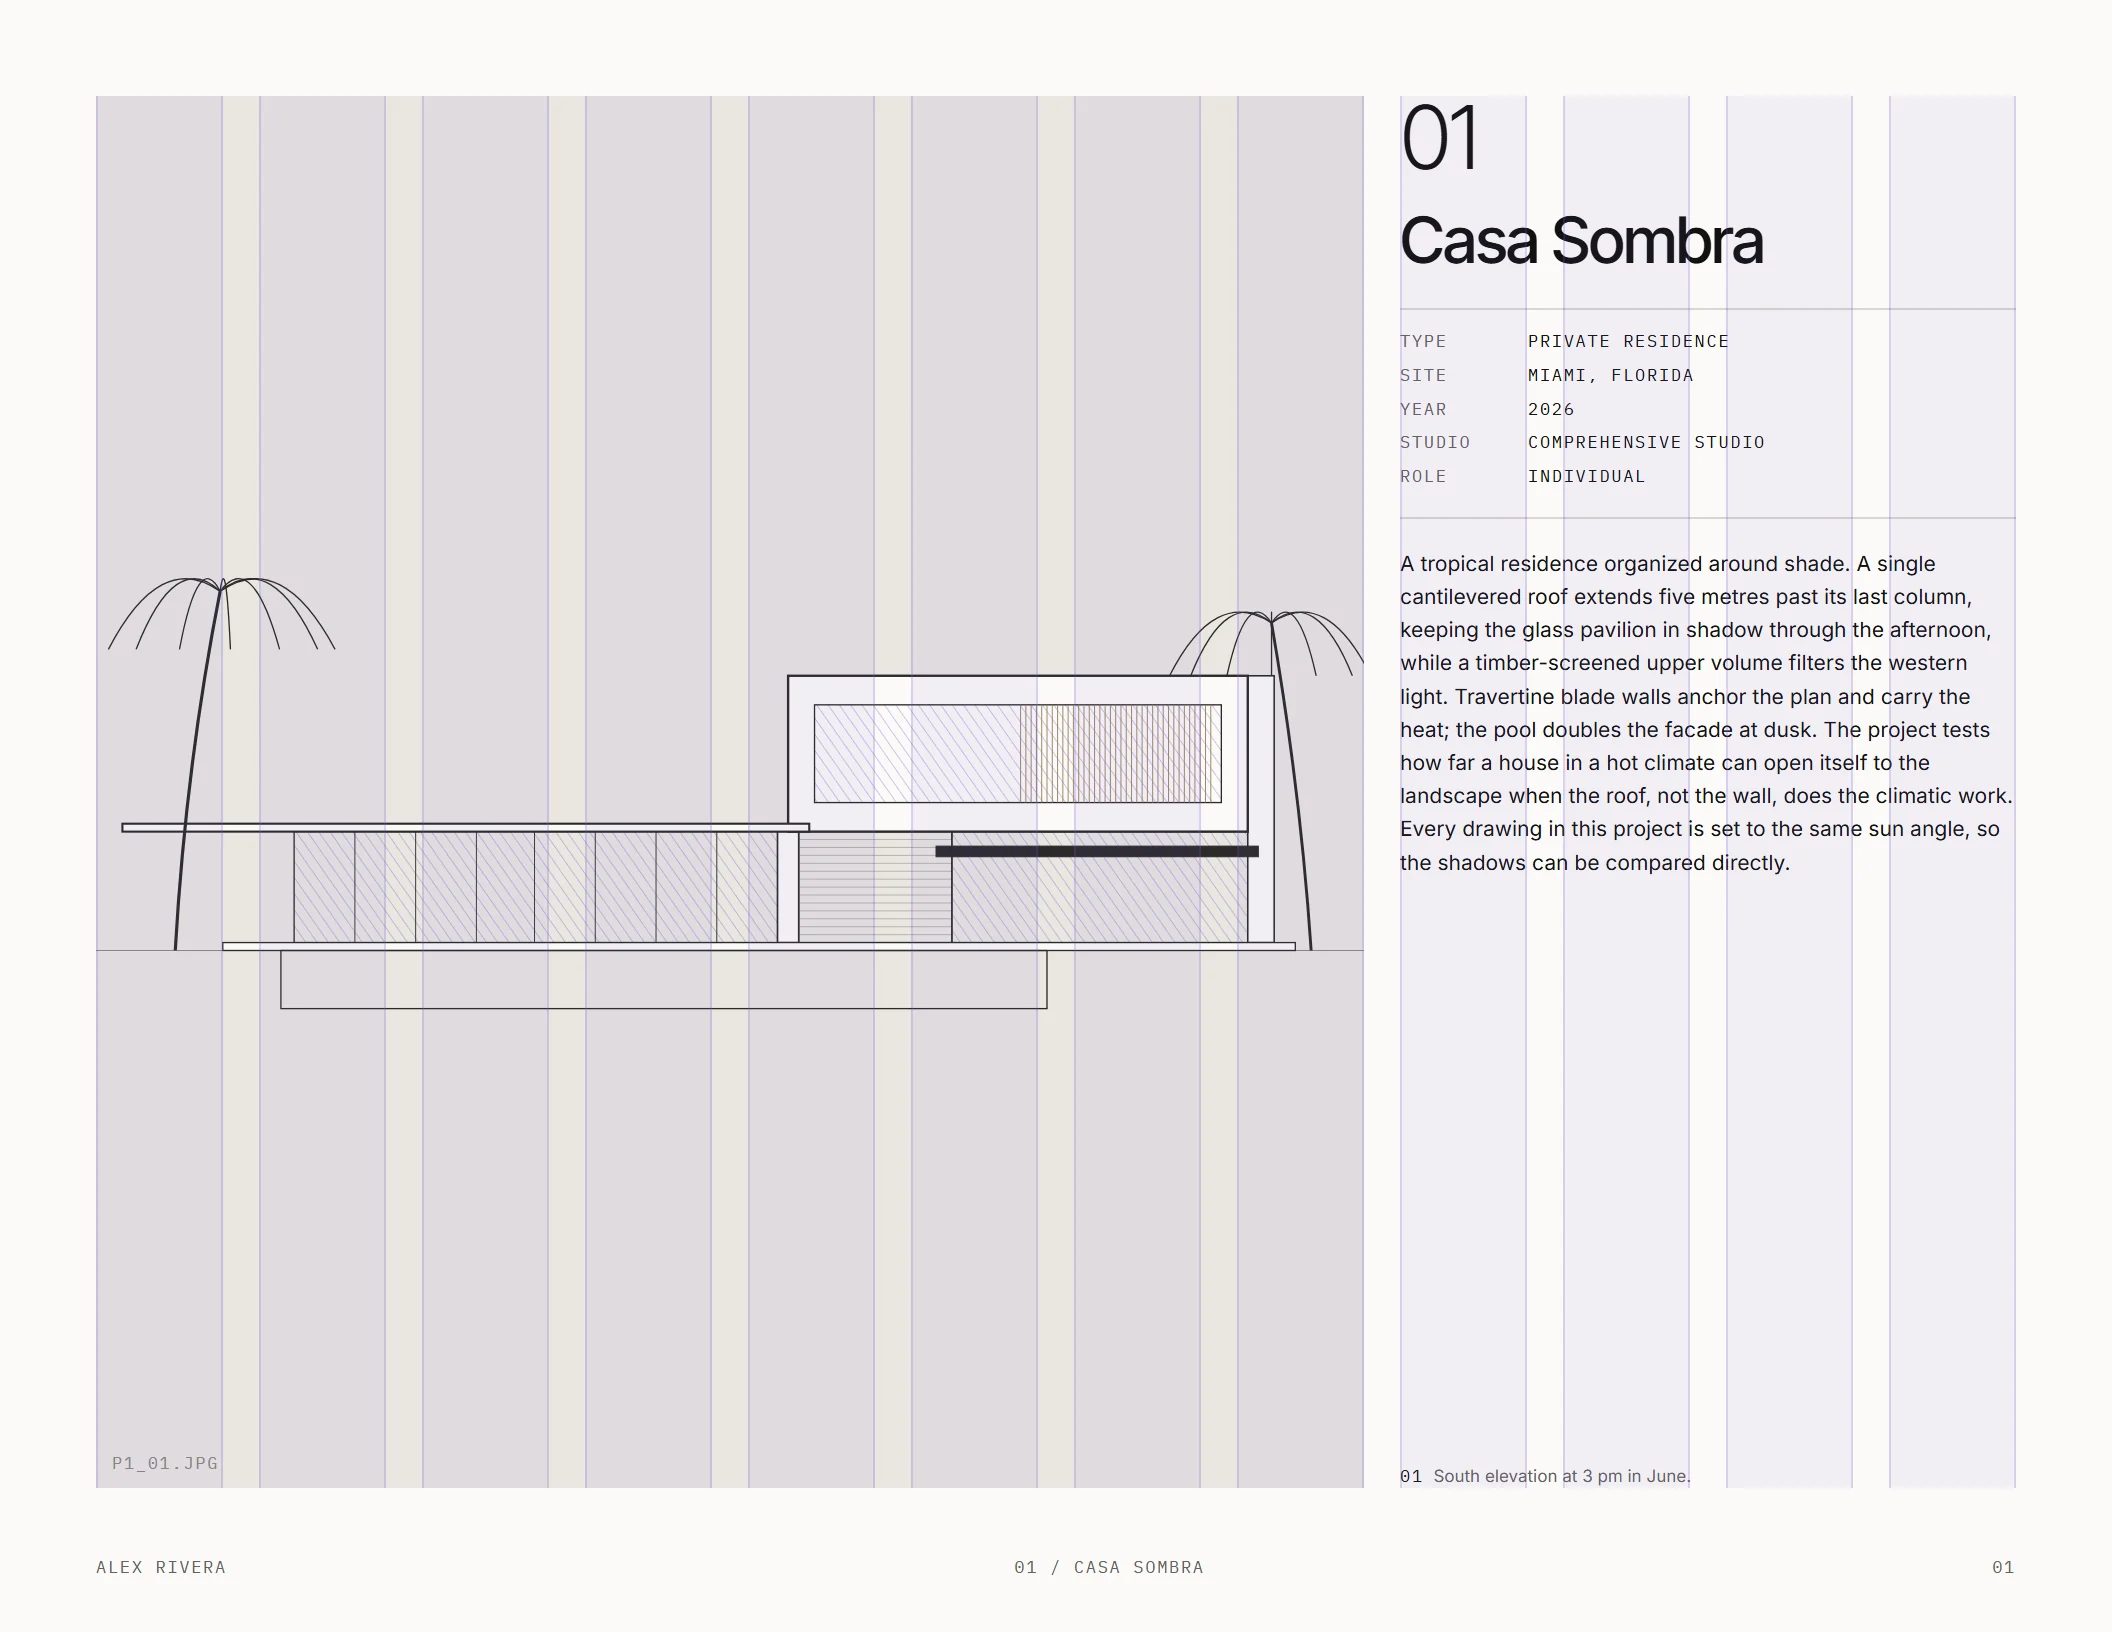
Horizontal pages give wide site plans and long sections room. Set up US Letter or A4 with 0.5 in margins, 12 columns and 0.1875 in gutters. The columns divide into halves, thirds and quarters, letting you vary image sizes while keeping alignments stable.
Choose a neutral grotesk throughout, an editorial serif for titles with sans text, or a wide grotesk in caps for short titles. Assign monospace to small labels and metadata. Start body text around 9 to 10 pt and check it at actual size alongside the drawings.
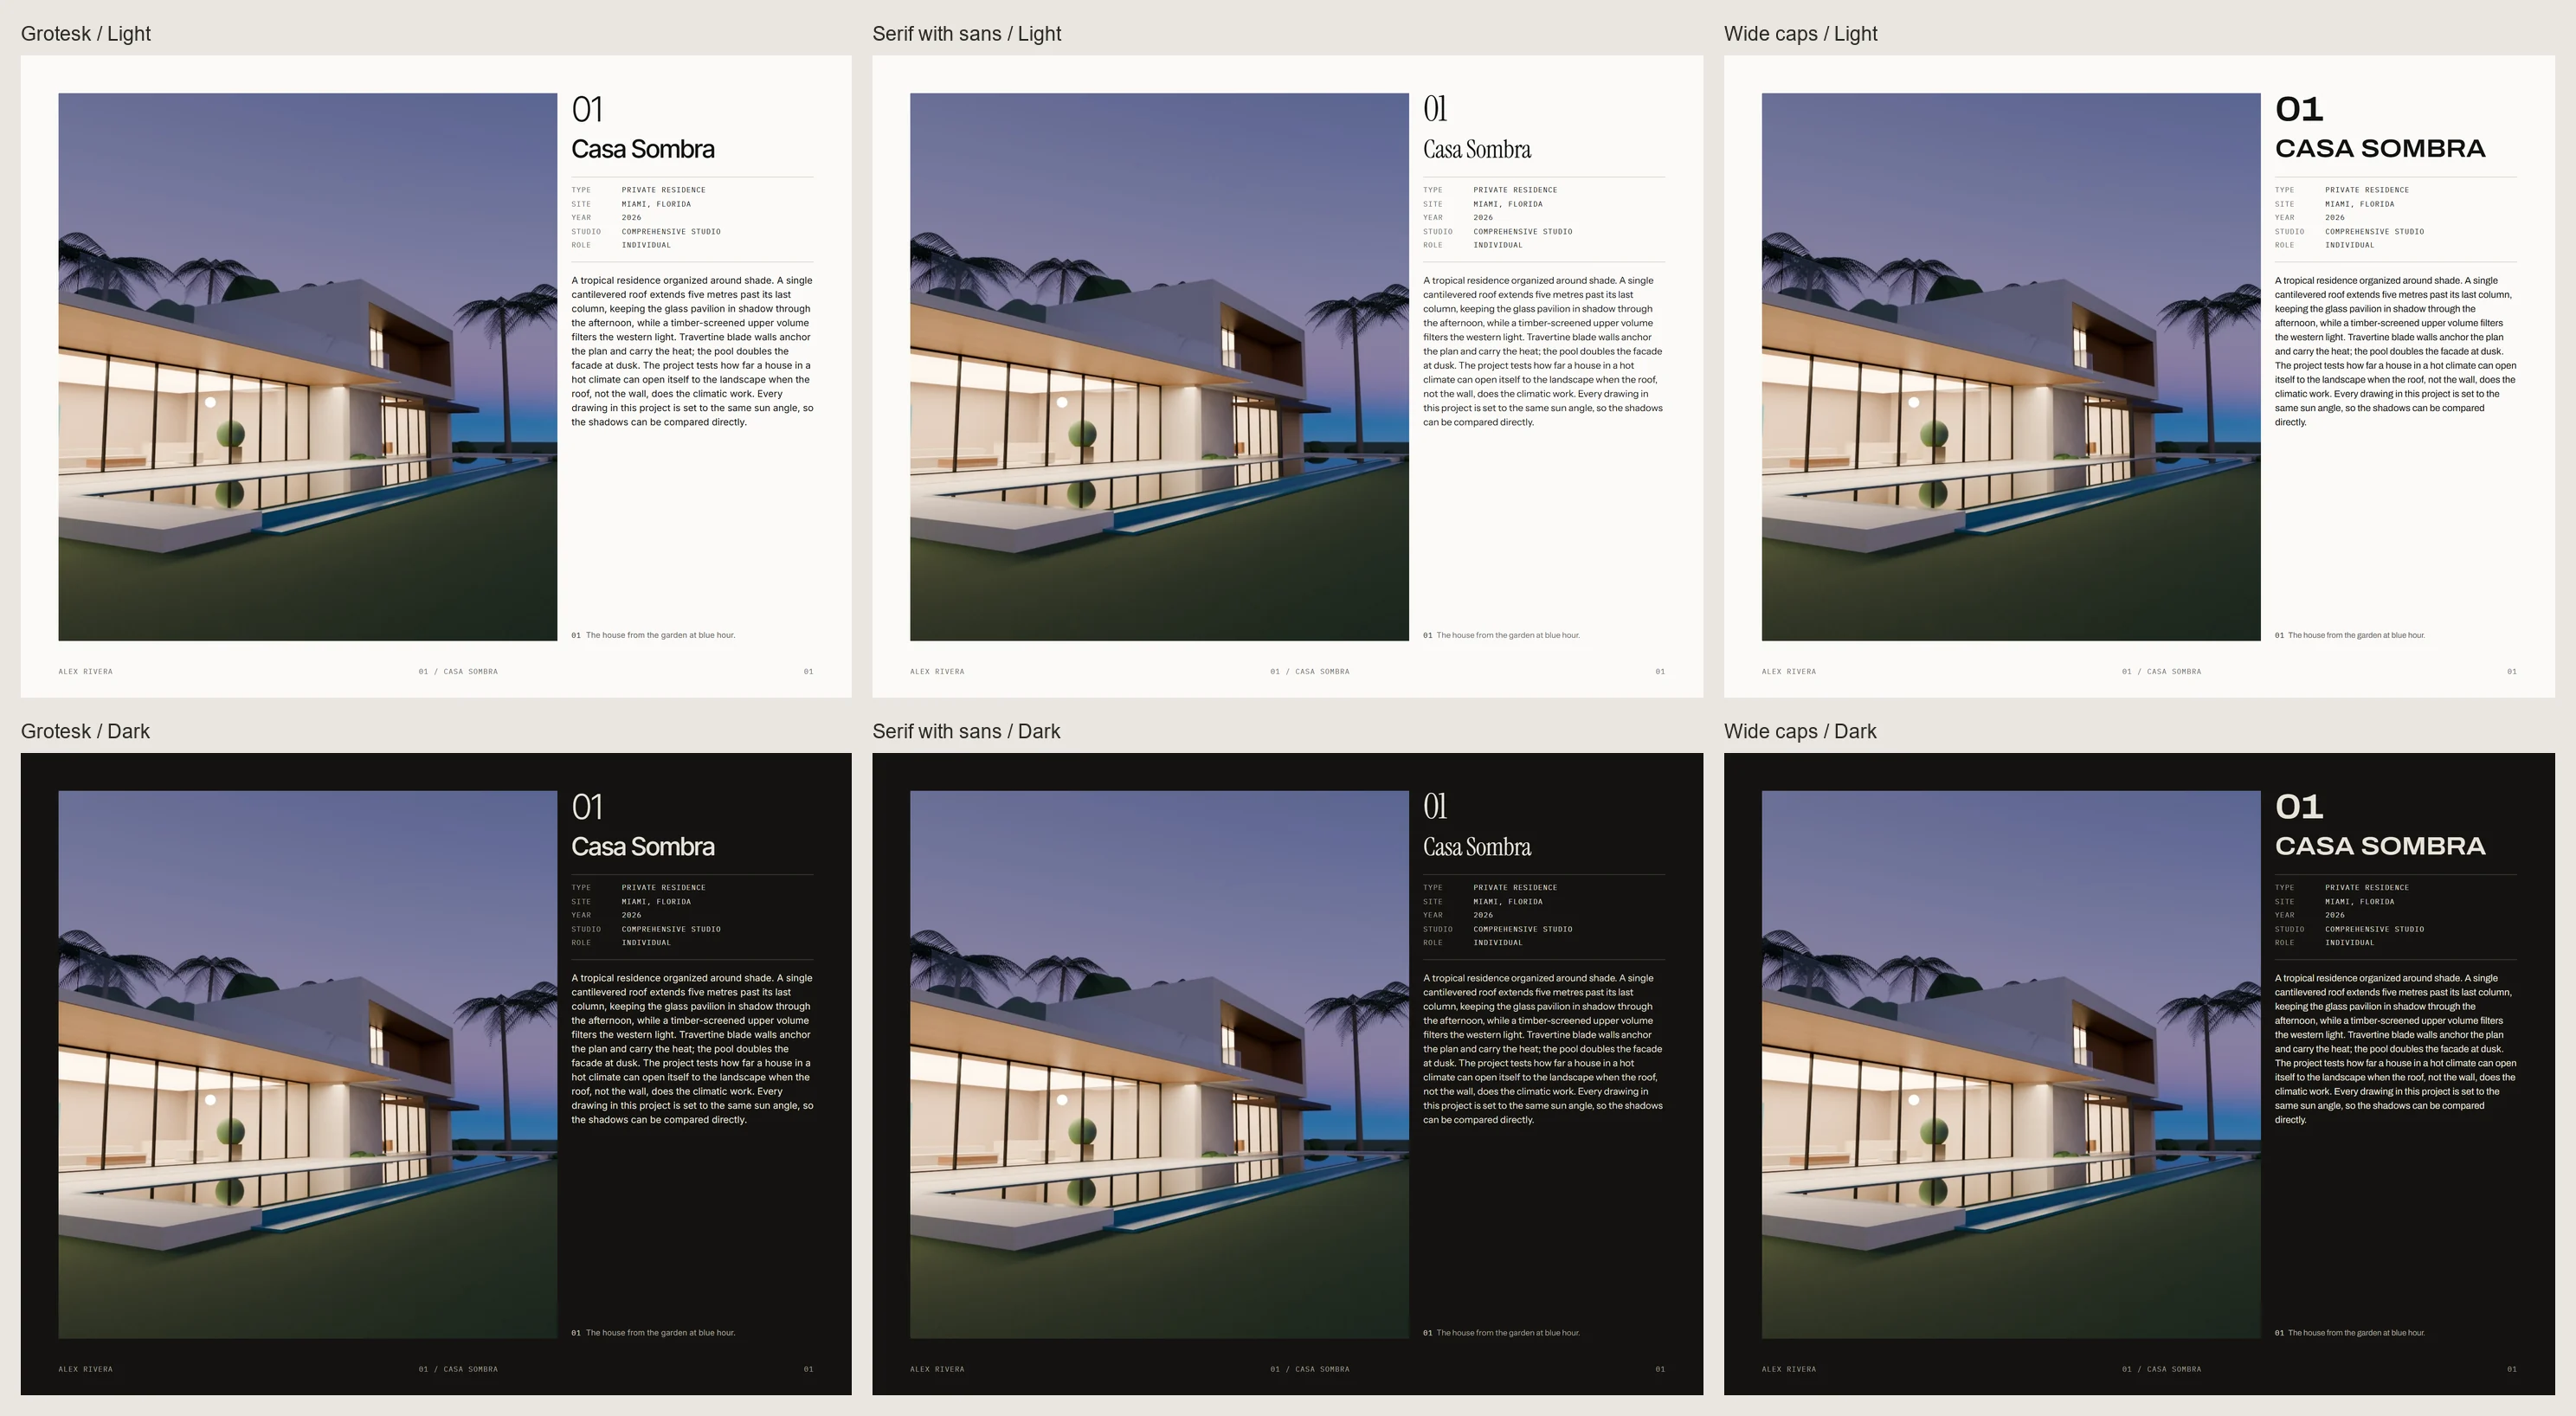
Compare light and dark editions in the annotated architecture examples. Light pages suit printing; dark pages need careful checks on linework and caption contrast. Keep drawing backgrounds consistent with the chosen edition. Use paragraph styles to make changes across the file, and cut repeated writing before shrinking the type.
Check the PDF you will send
Keep your application PDF under 10 MB, following any specific submission limit. Open the exported file and read it at page size, including legends and contact details. If compression damages drawings, adjust image exports or remove repeated views, then check the file again.
For print, export at 300 ppi with bleed and verify drawing scales at the intended page size. Keep the work sample and core versions clearly named so you attach the intended file.
The Skiaform Portfolio architecture portfolio template for InDesign uses architecture sample projects. Its page structure works for landscape projects too: replace the samples with your site plans, sections and supporting work. Use the layout guide for the shared page system and the website guide to carry the same selected projects online.
FAQ
How many projects should you include?
Choose 3 to 5 of your best projects for the core portfolio. The sequence above uses three, with more space for the first project's drawings. Keep your selection focused enough to explain every project and your contribution.
What can you include if you have no built work?
Use studio projects and label them as academic proposals. Show the site conditions you studied, the design you developed and supporting drawings. Include planting, grading or material studies when you can explain how they relate to the proposal.
Should you include hand drawings?
Include hand drawings when they explain observation, design development or a spatial idea. Scan them cleanly and check the result at final page size. Keep watercolour washes and pencil marks visible without making the page background distracting.
How big should the PDF be?
Keep the application PDF under 10 MB unless the application specifies another limit. Check the exported file for readable labels, clear linework and complete contact details. Reduce repeated material before accepting compression that makes a drawing difficult to read.
Should you use portrait or landscape pages?
Use landscape for this system because wide plans and sections have more room. Keep the same orientation in your work sample and core portfolio. If an application requires portrait, rebuild the page arrangements and check the drawings at their new size.
Get the free portfolio checklist
A two-page checklist of the portfolio basics, from choosing projects to sending the PDF. It downloads as soon as you sign up. No spam.